See "How to create a new project?" and "How to choose columns for my checklist?" for more information on how to create projects and choose columns.
- After you've created a new project and selected your columns, click on "Row Numbering"
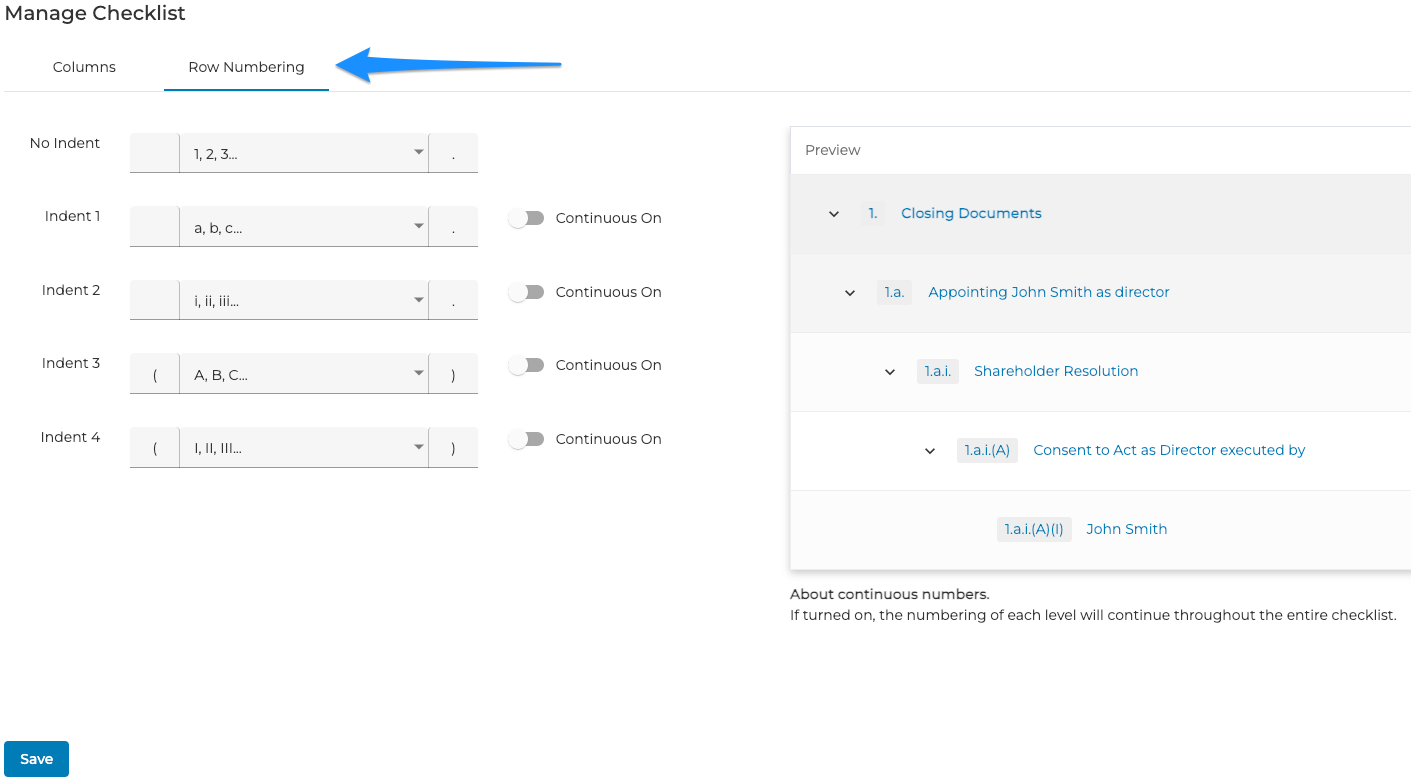
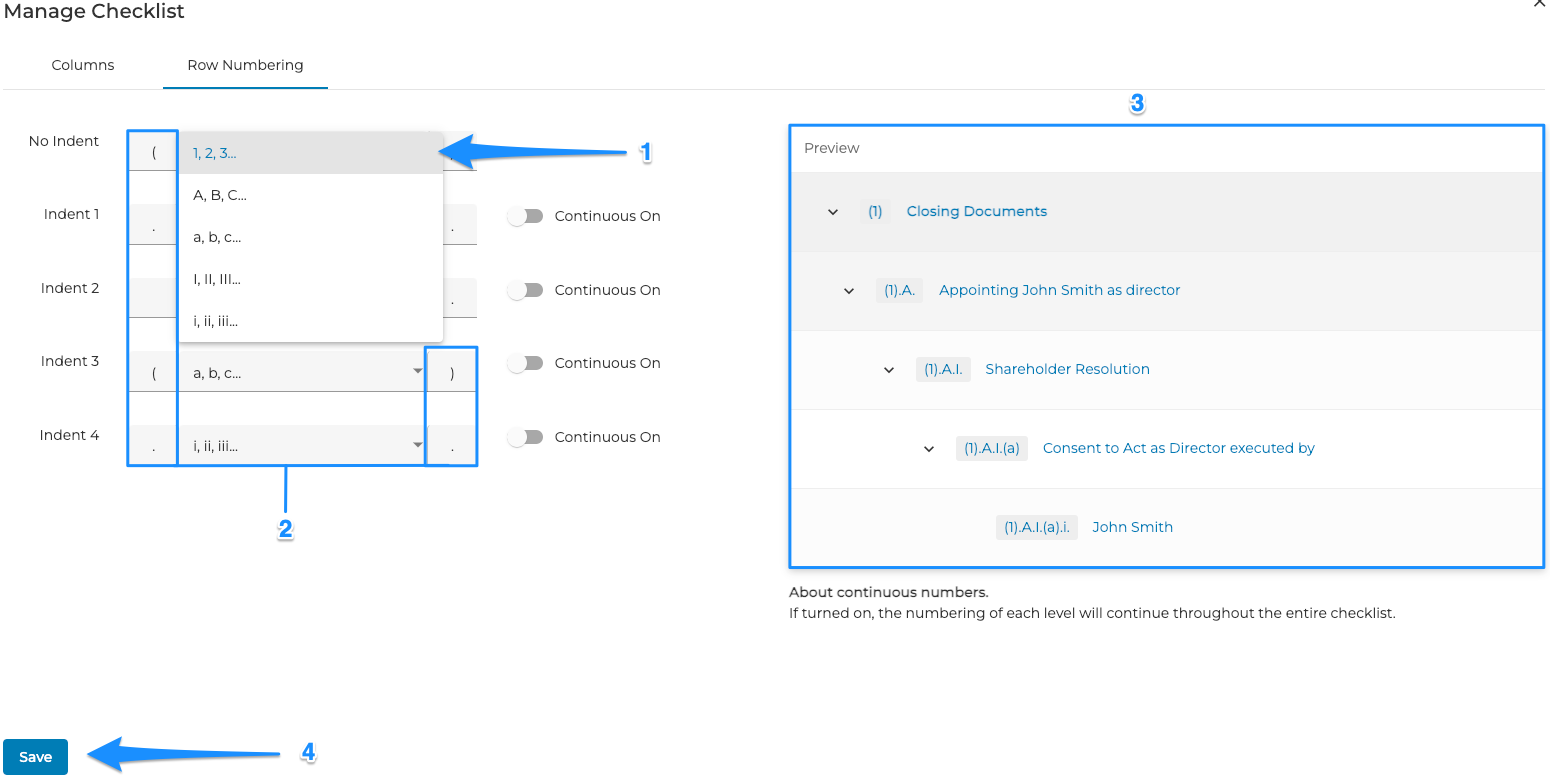
- Start by setting the numbering for each indent level in your checklist (or use the default settings). Each checklist row can be indented up to 4 levels and has five unique ways of numbering.
- The boxes on either side of the numbering are used to set whether each indent level includes other symbols like brackets, periods, spaces, etc.
- A preview of the row numbering for each indent level will be shown on the right-hand side of the screen.
- Once you are happy with your numbering, click "Save".
Row Numbering can be changed at any time by clicking "Manage Checklist" on the Checklist Tab.
With vs. Without "Continuous On"
If "Continuous On" is toggled, the numbering on each level of indent will not be affected by Headers, Subheaders, or a lower level of indentation. For example:
With continuous numbering:
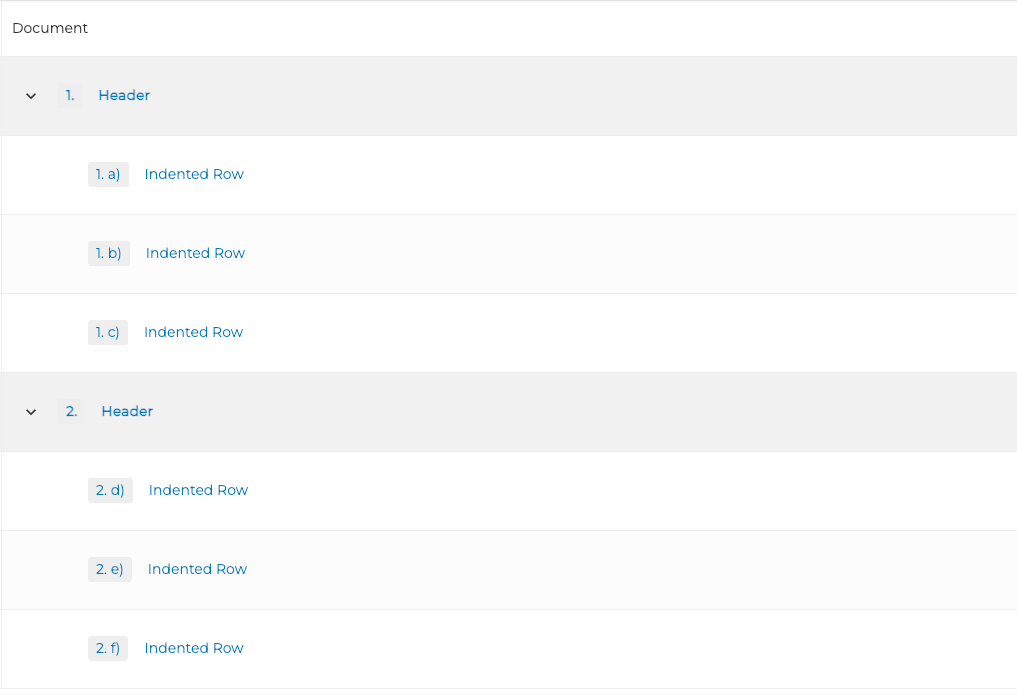
In this example, the indented rows in the second header are numbered "2. d)" "2. e)" and "2. f)" since the indent numbering is unaffected by the new header and is continuing from the indented rows under the first header.
Without continuous numbering:
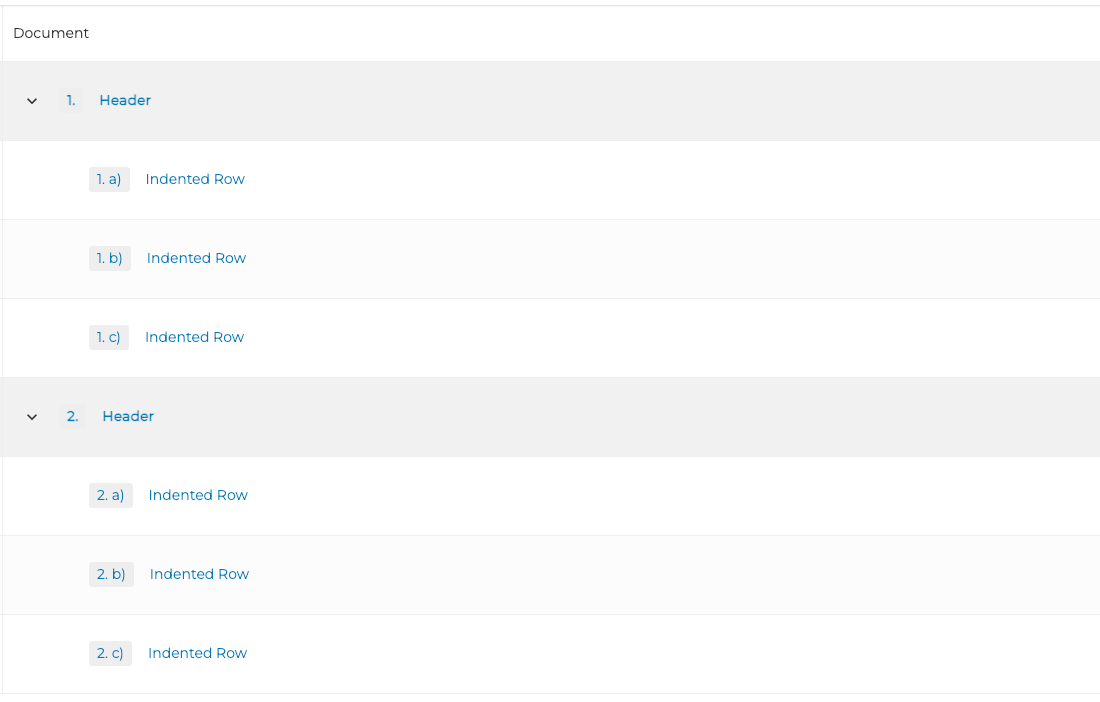
In this example, the indented rows in the second header are numbered "2. a)" "2. b)" and "2. c)" since the numbering is reset by the new header and is not continuing from the indented rows under the first header.
Indenting, Unindenting, Reordering, and Collapsing Indented Sections
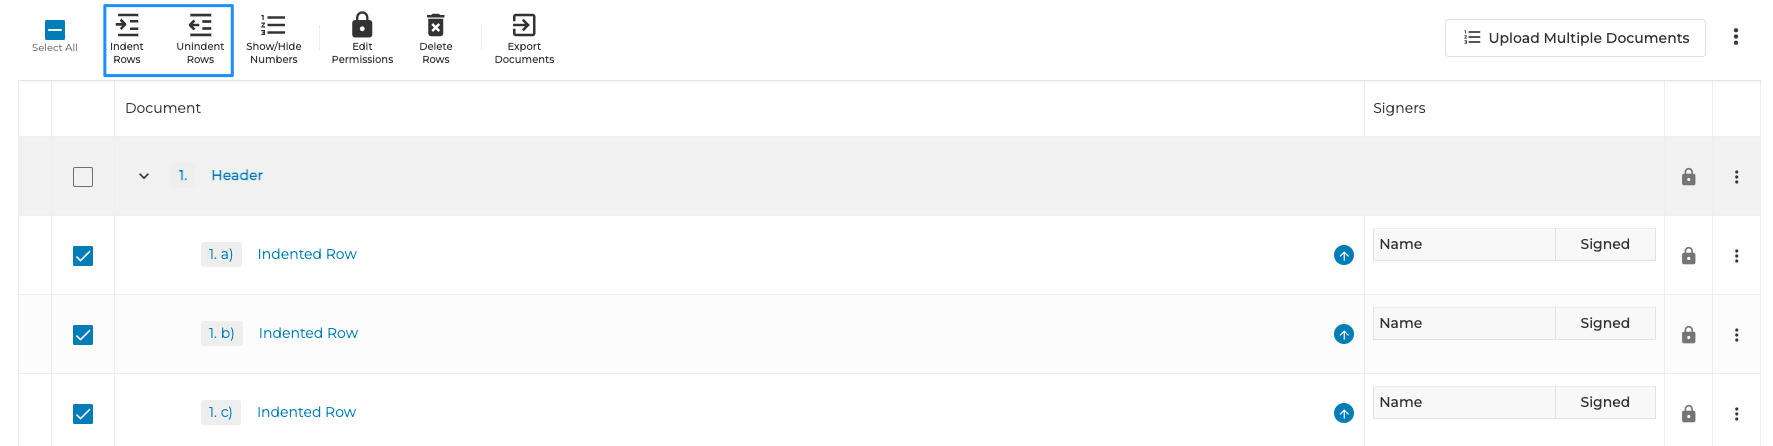
- Select the rows you would like to indent or unindent by clicking the boxes to the left of the row name.
- Click either "Indent Rows" or "Unindent Rows". The rows will shift right or left as a result and take on the numbering you set previously.
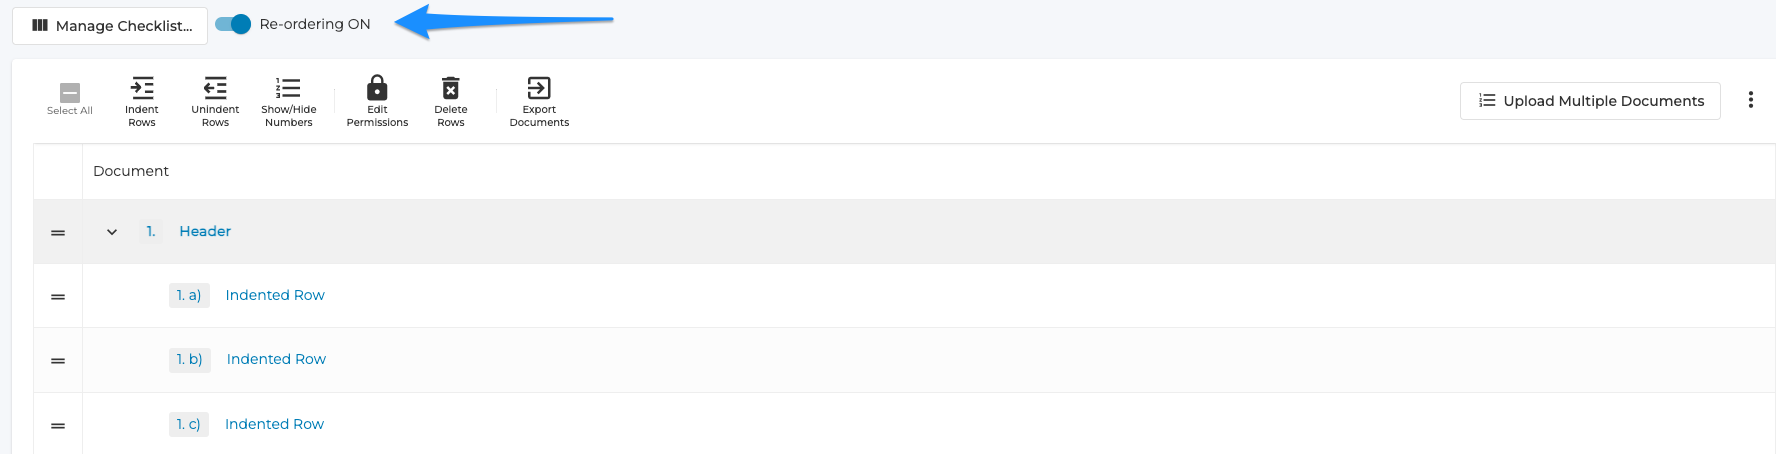
- You are able to collapse each section by clicking the arrow to the left of the header name
- You are able to reorder entire sections by clicking "Re-Order On" and drag and dropping the Headers to a desired spot in the checklist.
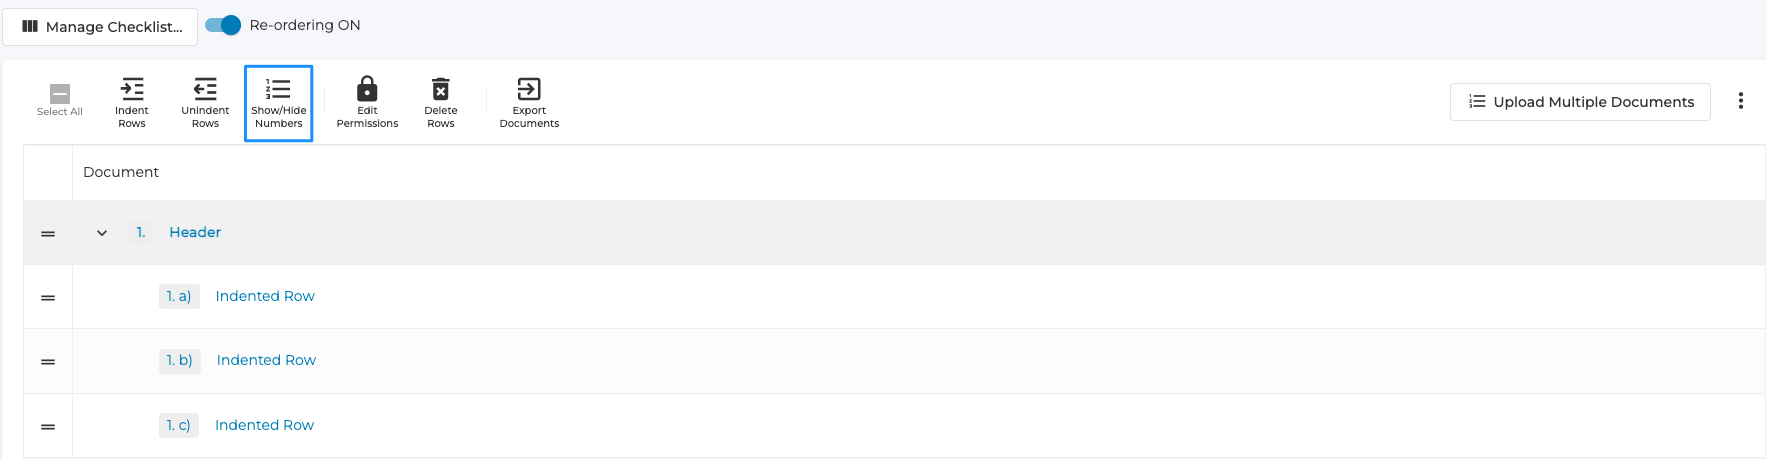
- If you wish to hide numbering on the checklist, select the boxes to the left of the row name and click "Show/Hide Numbers"