See "How to create a new project?" for more information on how to create projects.
- After creating a new project, click "Import Checklist" on the right side of the screen of the checklist page.

Select "Download Template .DOCX" to download a template for .DOCX checklist that works well with our checklist import tool.

- Click "Begin Importing" to start the four-step import process and select your existing checklist file.
- The list of documents in your checklist must be contained in one continuous table. Your checklist may contain more than one table but the list of documents must be in one continuous table.
- We only support plain text values in columns (for example, no radio buttons or checkboxes).
- We only support .DOCX.
- Every time you import a checklist you will delete every existing row present before the import.

- Select your existing .DOCX checklist and click "Upload File."
Step 1: Columns

- Dealcloser will match the column headers in your Word checklist and provide a preview.
- You can rename the columns by clicking on the column name or delete the column entirely by clicking the three dots beside the column name.
- Click "Next Step" when all the labels are correct.
- If the column labels are incorrect, select "Table header incorrect." You only need to undertake this step if Dealcloser did not correctly identify the overall table header.
If the table header is incorrect, it is likely that there are multiple tables present in the .DOCX file, which is not currently supported.
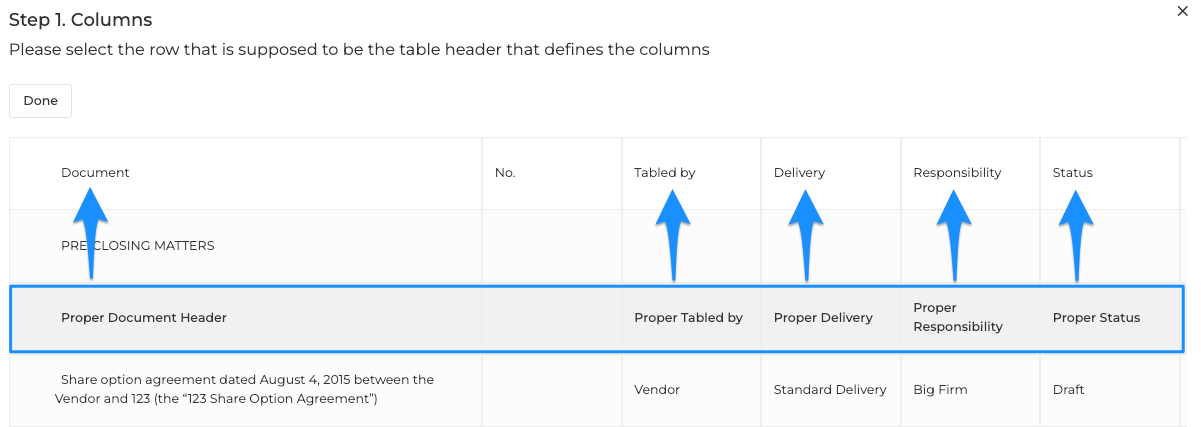
- Select the row that is the correct header row and replace the incorrect header row.
- In the above example, the column names would be replaced with Proper Document Header, Proper Tabled by, Proper Delivery, Proper Responsibility, and Proper Status.
- When the proper row has been selected click "Done" to return to the previous screen.
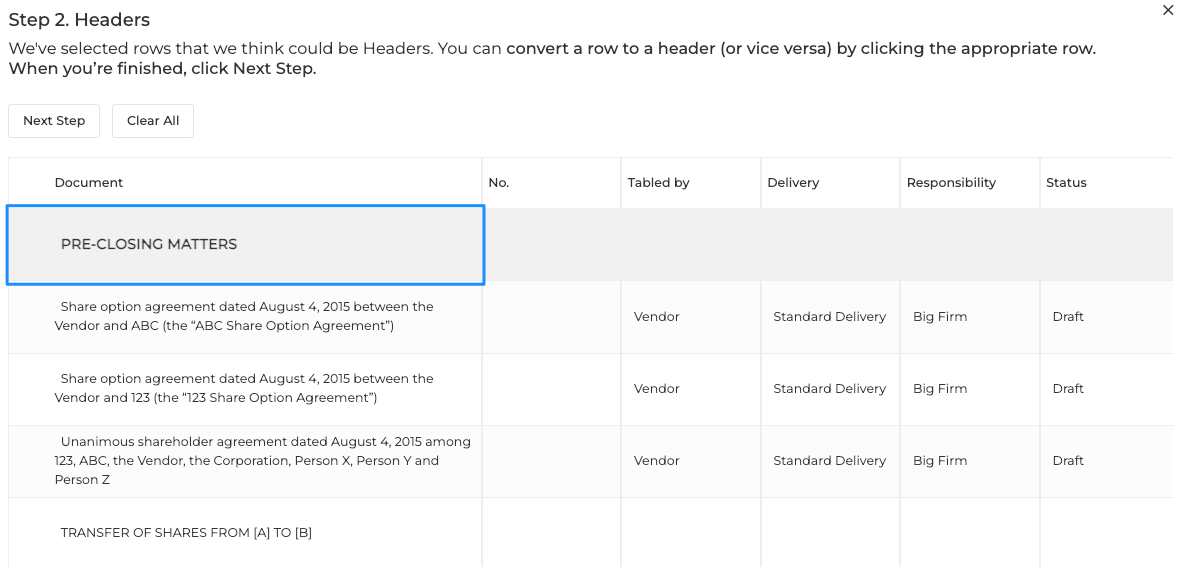
Step 2: Headers
- If your checklists contains headers click "Yes."
- If your checklist does not contain headers click "No" and continue to Step 3.

- Dealcloser will automatically select the rows it considers to be potential headers.
- Select the applicable row to convert it into a header if Dealcloser incorrectly identified that header as a row.
- Select the applicable header to convert it into a row if Dealcloser incorrectly identified that row as a header.
Step 3: Subheaders
The process to identify and select subheaders is the same as identifying and selecting headers.
- Dealcloser will automatically select the rows it considers to be potential subheaders.
- Select the applicable row to convert it into a subheader if Dealcloser incorrectly identified that subheader as a row.
- Select the applicable subheader to convert it into a row if Dealcloser incorrectly identified that row as a subheader.
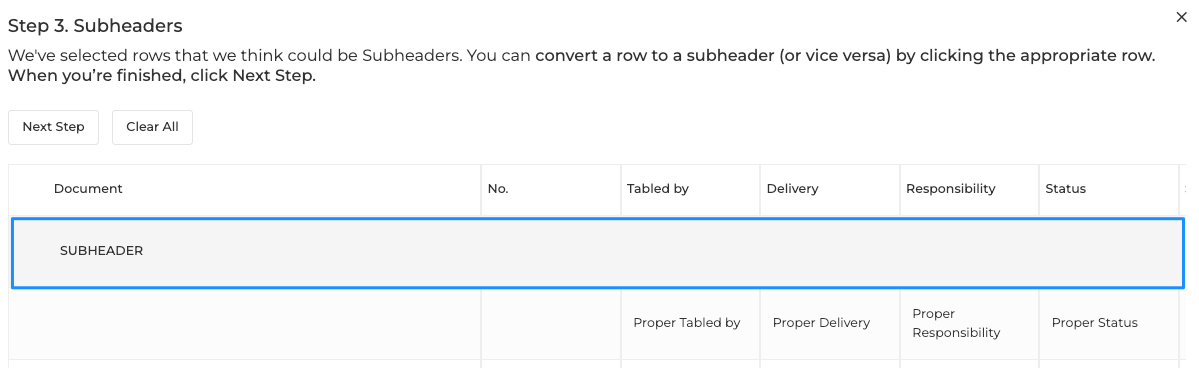
- When the proper rows have been selected click "Next Step" to go to Step 4.
Step 4: Row Indenting
- If you would like to indent the checklist select "Preview Indenting."
- If you are happy with the indenting select" Use Indenting" (this will only appear after selecting "Preview Indenting").
- If you would like to skip indenting, click "No Indenting."

You can adjust, indent, or remove indenting at any time after importing the checklist.
- See How do I manage multi-level checklists? for more information.
Step 5: Final Preview:
- A preview of your checklist will be shown for your review.
- You can edit the contents of each row by clicking the applicable text.

You won't see any row numbers until the checklist is imported. Once imported, click Manage Checklist to change numbering.
- See How do I manage multi-level checklists? for more information.
-
Click "Create Checklist" to complete the import.