How do I configure the integration between DealCloser and NetDocuments on the NetDocuments side?
This is for users who wish to configure the DealCloser and NetDocuments integration on the NetDocuments side.
Only the NetDocuments Repository Administrator will need to take the below steps and by doing so, this person will set the configuration up for all users at their firm.
Create a NetDocuments service account:
- Log into your NetDocuments account.
- Click on your name in the top right-hand corner.
- Click "Admin".
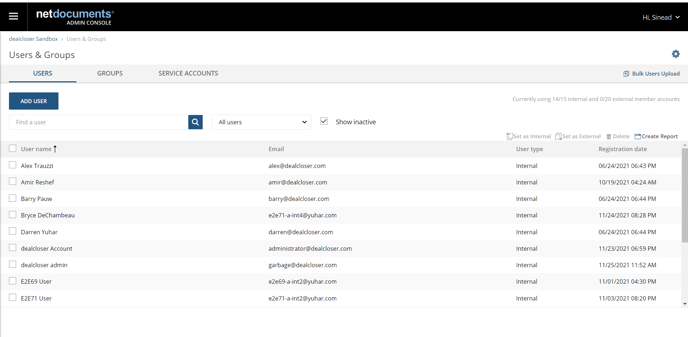
- Click on the main menu in the top left corner.
- Click "Add User".

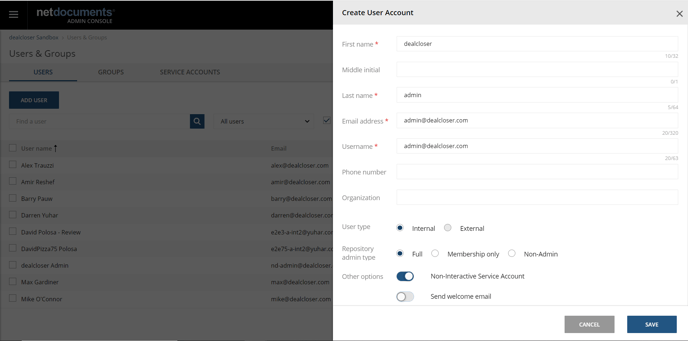
- Enter "admin@dealcloser.com"
- Enter "dealcloser" for your First name.
- Enter "Admin" for your Last name.
- Select "Internal" for User Type.
- Select "Full" for Repository Admin Type.
- Select "Non-Interactive Service Account" for Other Options.
- Deselect "Send Welcome Email".
- Click "Save".

Go to "Service Accounts":
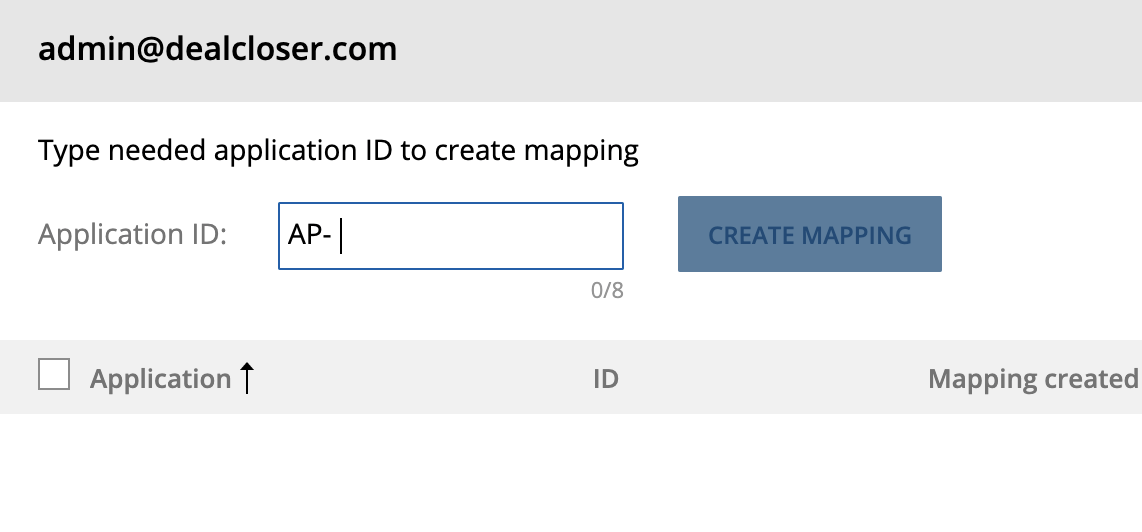
- Click on "admin@dealcloser.com".
- Click "Edit".
- Depending on your region, enter the appropriate ID:
US: AP-(K1U75C1K)
EU: AP-(F65YK9S0)
DE: AP-(X7XITR2Z)
CA: AP-(646AS7WJ)
AU: AP-(JPWIWQAM)
-
- Please enter only the text in the brackets above and do not include the brackets.

- Click "Create Mapping".
- Click "Save".
Go to "Groups":
- Click on "admin@dealcloser.com".
- Click "Edit".
- Click "Groups".
- Click "Add Group".
- Select a group that has at minimum VE permission to the cabinet that contains your matter workspaces and documents.
- Click "Add Groups".
- Click "Save".
Click on the main menu in the top left corner and go to Cabinets:
- Click on the cabinet that contains your matter workspaces and documents.
- Under the Cabinet Administrators heading, select the dealcloser Admin account in the Internal Members list and click "Add" to add it as a Cabinet Administrator.

- Scroll to the bottom of the page and click "Submit".